RAPIX Lighting Control System – Demonstration Project | DALI 照明制御
The RAPIX Demonstration Project is used with RAPIX Integrator to show some of the features of the RAPIX Lighting Control System.
The Demonstration Project can be downloaded HERE. A Video describing RAPIX Integrator Floor Plans can be found HERE.
The Demonstration Project
The RAPIX Demonstration Project is for a four-floor building:
- Ground Floor: Car parking
- Floor 1: lobby and common areas
- Floor 2: offices
- Floor 3: roof top areas
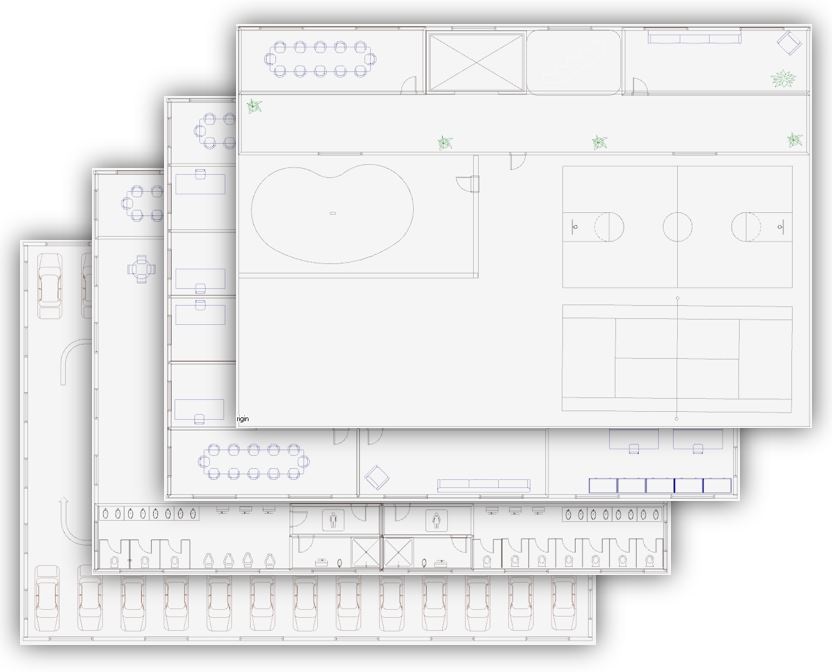
Floor by floor
Basement/Bottom Floor: Car Park
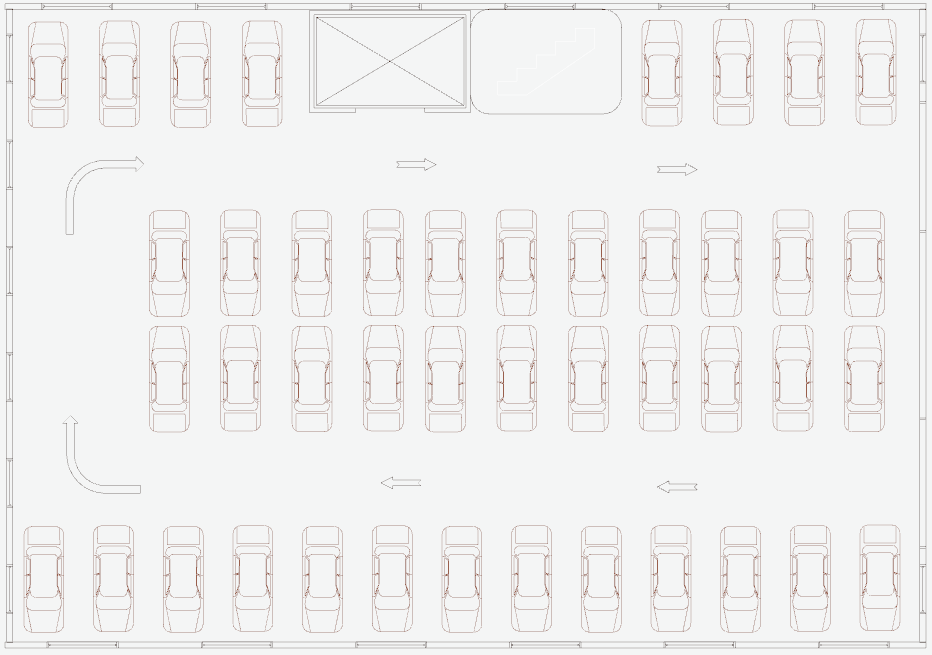
Car Park
Level 1: Lobby and Common Areas
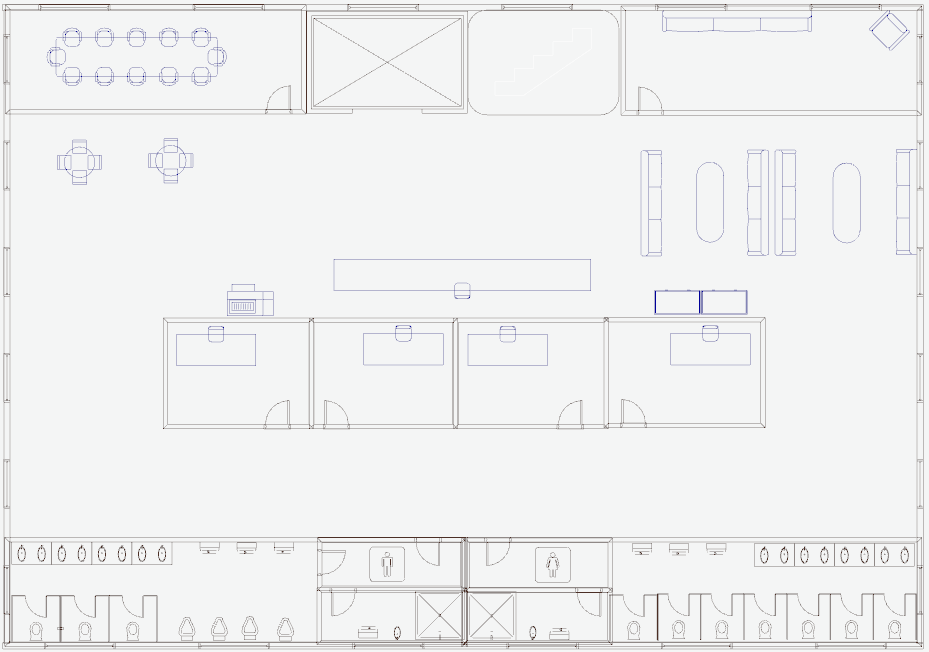
Common Areas, break-out rooms, toilets
Level 2: Offices
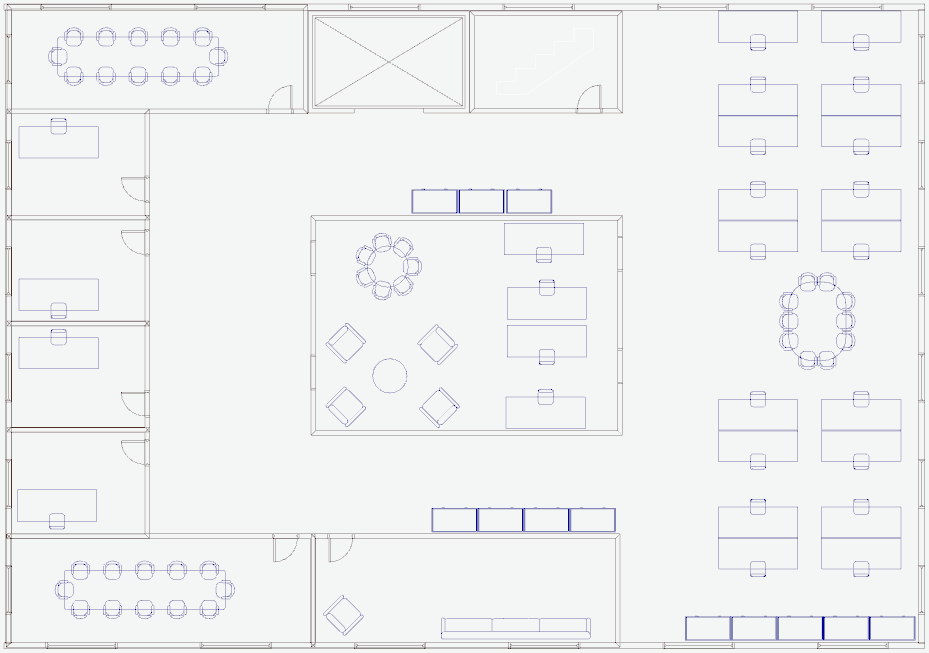
Office space, break-out room, meeting rooms
Level 3: Rooftop
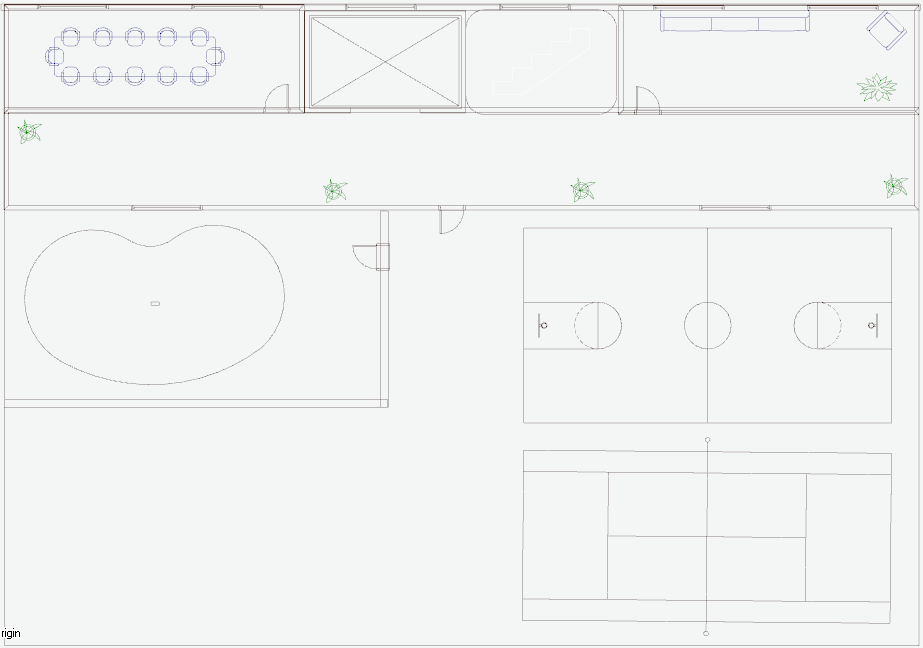
Recreation area, board room
Exploring the Demonstration Project
Open the Rapix Demo Project file in RAPIX Integrator.
This allows you to explore many of the features of the RAPIX Lighting Control System.
Building Requirements
The demonstration building requirements are primarily driven by energy efficiency and user comfort.
Requirement List:
- All offices and corridors are controlled by sensors only.
- Meeting rooms have sensors and manual light level control.
- The sensors time-out more quickly after-hours than during work hours.
- The first person to arrive on floor 1 or 2 in the morning should not be entering a completely dark floor. To achieve this, the Zones adjacent to the lift should be always lit during work hours, then controlled by a sensor after-hours.
- The last people at work in the evening should have the path to the exit lit so that they are not surrounded by darkness when working at night.
- The building exterior should be brightly lit from sunset until 1 AM, then dimly until just before sunrise.
- The car park is partly open for natural lighting. The eastern side of the car park receives natural sunlight, and requires the lights to be dimmed when there is adequate external lighting.
- A dry contact output from the security system needs to switch off all lights in the building when the security system is armed.
- A second dry contact output from the security system needs to switch on all lights in the building if the alarm is activated.
These requirements are implemented through a combination of RAPIX devices, Schedules, Operating Properties, Flags and RAPIX templates.
The RAPIX hardware for this site includes:
- A Zone Controller per floor;
- DALI LED luminaires throughout most of the building;
- DALI Colour luminaires in the lobby;
- DALI Relays and Phase Dimmers on the top floor for controlling specialised architectural lighting;
- eHub sensors and Xi Sensors for sensing occupancy;
- eHub switches for manual control in the meeting rooms; and
- eHub switches for manual control of the top floor.
Implementing the requirements
Operating Properties
Requirement 3 means that the building has modes: A Work Hours mode and an After Hours mode. An Operating Property is perfect to represent the building mode.
In the RAPIX Demo Project, this Operating property is called “Building Mode”.
This can be seen in the Properties tab of RAPIX Integrator:
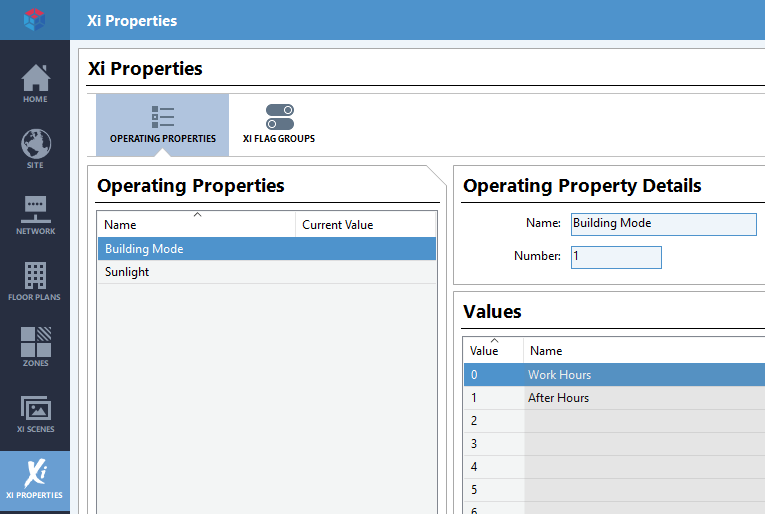
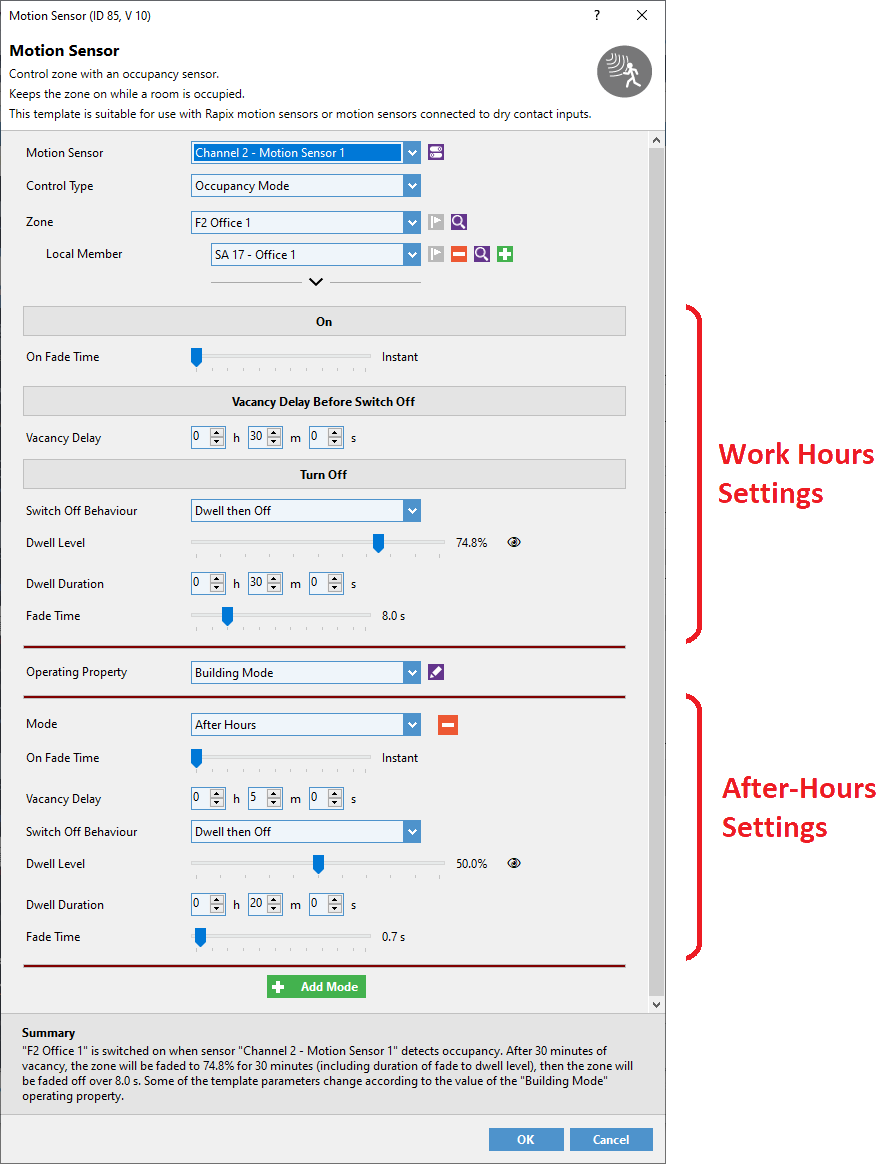
Requirement 3 also means that the sensor templates use the building mode to change behaviour dynamically.
This can be observed in all of the sensor templates, such as the template for Floor 2, F2L1 North, eHub 192, Channel 2, sensor 1:
Another Property called “Sunlight” is used to select the Light Level maintenance level for the car park entrance, as needed for requirement 7.
Another Property called “Sunlight” is used to select the Light Level maintenance level for the car park entrance, as needed for requirement 7.

Flags
Requirement 4 means that the sensors for the Zone next to the lifts are disabled during work hours.
A Flag can be seen in the Properties tab:

The Flag is used in a disable rule which can be observed in the template for Floor 2, F2L1 North, eHub 192, Channel 3, sensor 1:

This disables the template when the Flag is not set (i.e. the template is enabled when the flag is set).
Schedules
Requirements 3, 4 and 3 require schedules to control lights and set the building mode. These schedules can be viewed in the Schedules tab of RAPIX Integrator:

Alarm Panel Interface
To implement requirements 8 and 9, the dry contact inputs of the eHub on the ground floor are used to pre-set the entire building to the required level.

Comfort Lighting
Requirement 5 involves keeping corridors lit when adjacent areas are on. This is achieved as follows:
- Create a Zone containing all Zones adjacent to the corridor;
- Use the Motion Sensor Advanced template for the corridor; and
- Select the “Dwell while adjacent areas are on” option and select the Zone from step 1.
An example of this is Floor 2, Corridor 1:

If there has been no motion in the corridor for 30 minutes, it will start the turn-off process. It will fade to 80.3% and dwell there while any of the adjacent zones are on. When the last of these adjacent zones goes off, the level will remain at the dwell level for another 10 minutes before fading off.
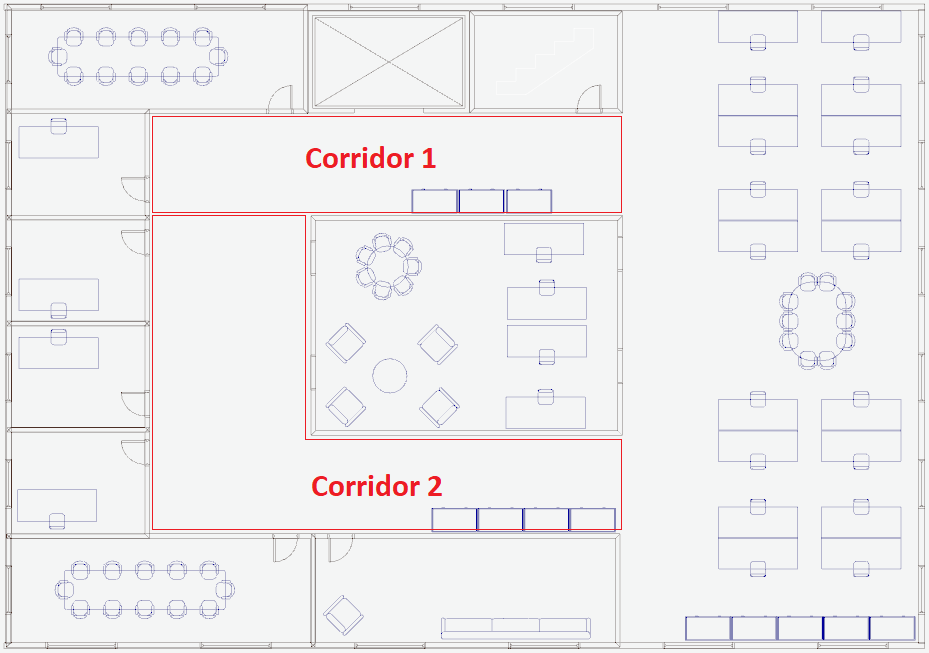
Note that the adjacent areas for Corridor 1 includes Corridor 2. Corridor 2 is also held on while any of its adjacent areas are on. This means that if any area at the south end of the floor is occupied, Corridor 2 will stay on and that will also keep Corridor 1 on.
Floor Plans
In the Floor Plans tab of Rapix Integrator, the floor plan for each floor can be viewed, along with Zones and the DALI devices.
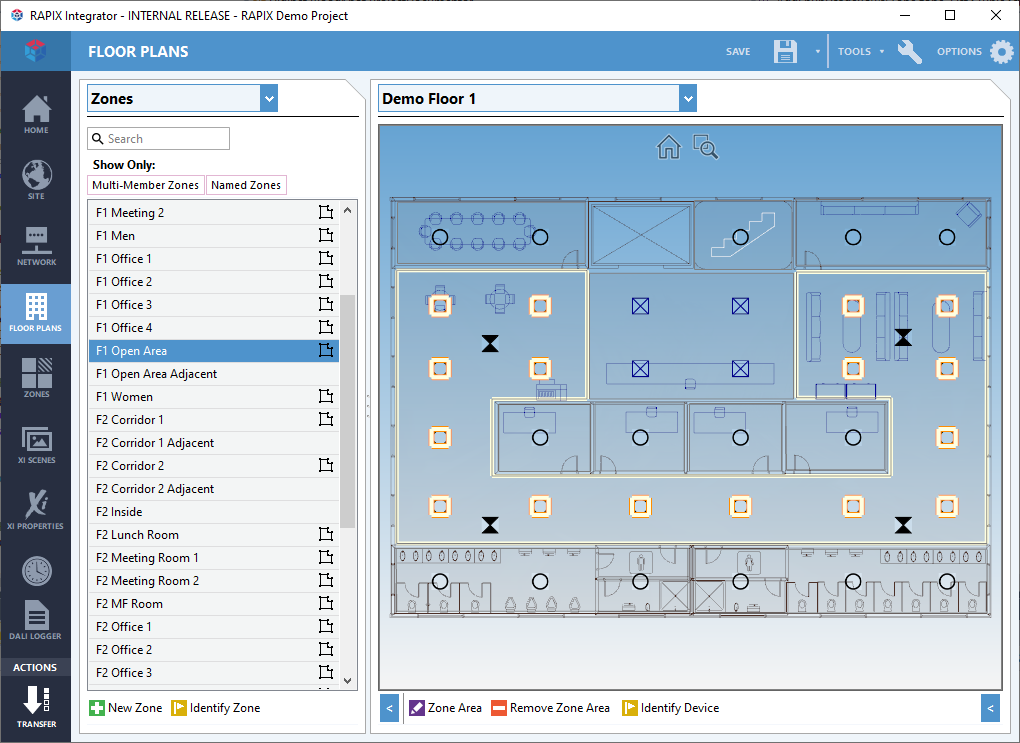
Refer to video for instructions on using floor plans.
Project Summary
To see a summary of the project, either:
- Select the Tools / Project Report menu item for an HTML summary; or
- Select the Tools/ Export to Excel menu item for a summary of the project in an Excel workbook.
受付時間 平日 10:00~17:00 (土日祝定休)
Subscribe
ご登録いただくと、製品やソフトウェアの最新情報をお届けします。